Google Slides offers an excellent platform to infuse style and vibrancy into your routine workplace presentations. Moreover, it serves as a versatile tool for educational settings, seamlessly adaptable for students across different age groups. Brimming with an array of graphics, animation tools, and immersive features, Google Slides empowers users to enhance their presentations. Additionally, the capability to incorporate personal audio and video content further enriches the slideshow experience. (Via)
Microsoft PowerPoint, Google Slides, and the Benefits of Adding Videos or Audio to your Presentations
Microsoft PowerPoint, like Google Slides, is a powerful tool for creating engaging presentations. One notable advantage of PowerPoint is its widespread use in business environments, offering compatibility with the Microsoft Office suite and seamless integration with other applications. Additionally, PowerPoint provides a wide range of design options, including templates, themes, and customization features, allowing users to create visually appealing presentations tailored to their needs.
Incorporating videos or audio into your PowerPoint or Google Slides presentations can significantly enhance their effectiveness and audience engagement. Videos and audio serve as dynamic multimedia elements that can convey information more effectively than text or static images alone. They help break the monotony of slideshows. They are extra ways to capture the audience’s attention and create a more immersive and memorable experience.
Furthermore, adding videos or audio allows presenters to demonstrate concepts, provide examples, or share testimonials more compellingly and persuasively. Whether it’s showcasing product features, explaining complex processes, or sharing customer testimonials, multimedia elements can add depth and credibility to your presentation.
Users can embed video or audio files directly into their slides or link to external sources for playback. Additionally, PowerPoint provides options for customizing playback settings, such as autoplay, looping, and timing, to ensure a seamless and synchronized presentation.
How To Add Audio in Google Slides
If you’re eager to enhance your Google Sheets presentations with captivating audio and visuals, this guide is tailored just for you. Here’s how to seamlessly incorporate these attention-grabbing elements:
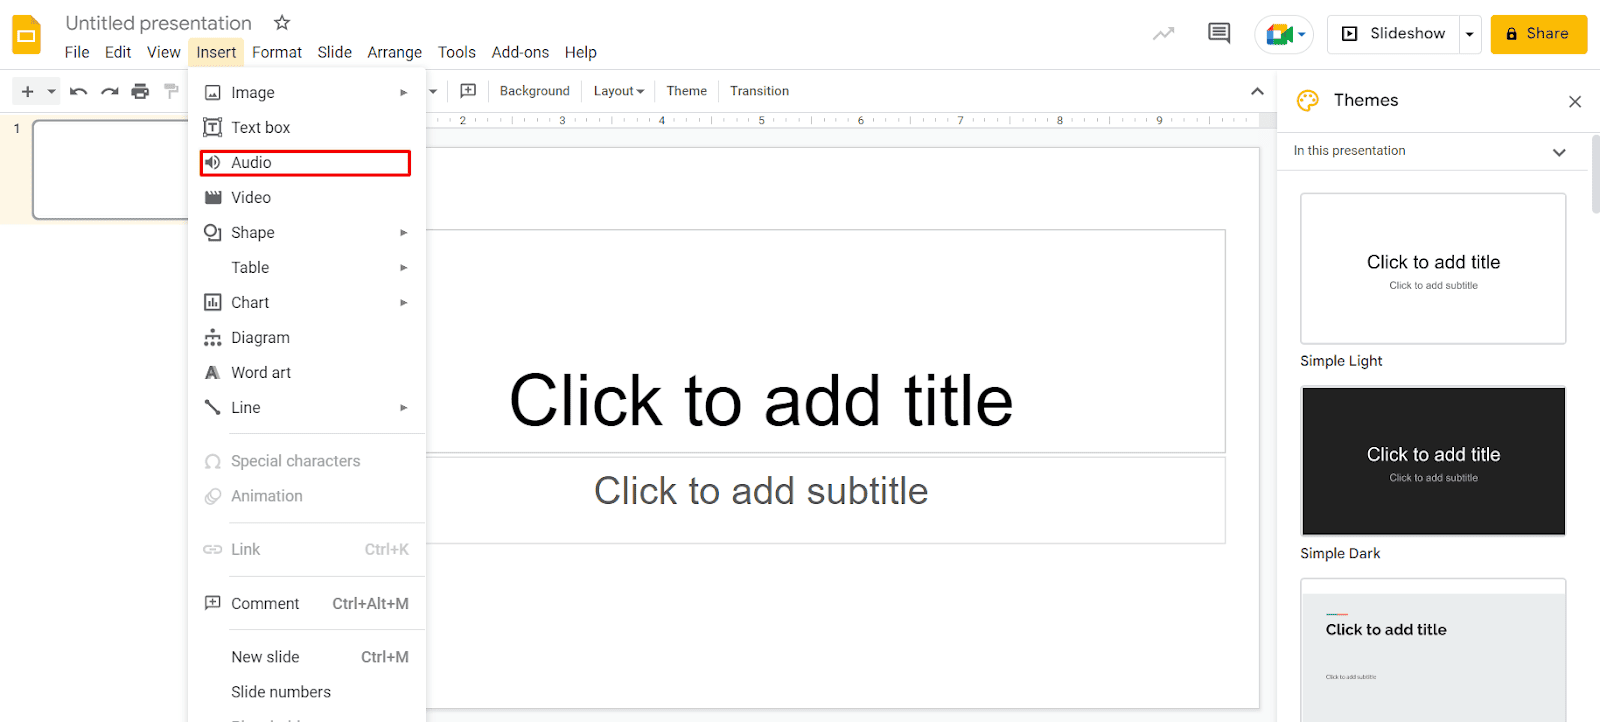
Adding audio to Google Slides:
- Ensure that the audio file you intend to use is stored in your Google Drive under the same Google account. Google Slides supports MP3 and WAV audio formats.
- Open Google Slides and sign in to your account. Access the presentation where you wish to include the audio and navigate to the specific slide where you want it placed.
- Select “Insert” from the menu and then choose “Audio.”
These simple steps enable you to effortlessly integrate audio files into your Google Slides presentations, enriching them with engaging auditory elements.
- Once you’ve located the desired audio file, simply select it and click on the “Select” button located at the bottom of the window. This action confirms your choice and inserts the audio file into your Google Slides presentation.
- Once inserted, the audio file will be visible on your slide. You have the flexibility to select and drag it to any desired location within the slide.
- Upon insertion, the Format Options sidebar will automatically open. In the “Audio Playback” section, customize the playback settings according to your preferences.
– Start Playing: Choose between “On Click” or “Automatically” to determine when the audio playback should commence.
– Options: Adjust the volume using the slider. Additionally, utilize the checkboxes to enable optional settings such as hiding the playback icon (applicable for automatic playback only), enabling loop playback, and halting playback upon slide advancement.
Once you’ve finalized the playback settings for your audio, you can close the Format Options sidebar. To access the sidebar again later, you can follow any of these methods:
- Right-click on the audio icon and select “Format Options.”
- Click on the audio icon and choose “Format Options” from the top toolbar.
- Select the audio icon and navigate to “Format” > “Format options” in the menu.
Unlike Microsoft PowerPoint, Google Slides currently lacks an audio recording feature. However, you can still incorporate audio narration by creating the narration externally and uploading it as described above.
How to Add Video in Google Slides
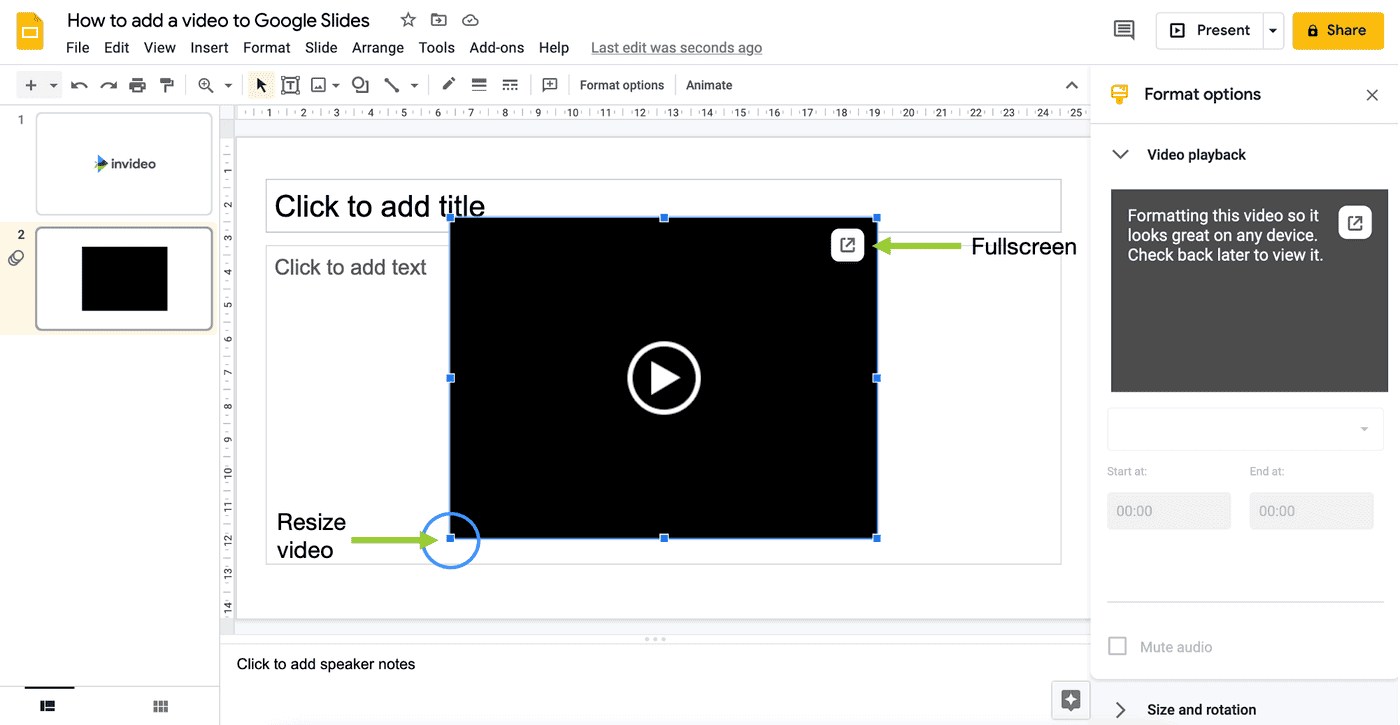
To add a video to your Google Slides presentation, you have several options available. Whether it’s a YouTube video, a URL link, or a video stored in your Google Drive, here’s how you can incorporate it seamlessly:
- Step 1: Sign in to Google Slides and navigate to the specific slide in your presentation where you intend to insert the video.
- Step 2: From the menu, click on “Insert” and then select “Video.”
- Step 3: In the pop-up window, located at the top, select the desired location for your video file: either by searching on YouTube, entering a URL, or choosing from Google Drive.
Once you’ve found the video you wish to use, simply select it and click the “Select” button to proceed.
- Step 4: Once inserted, the video will appear on your slide, allowing you to freely drag it to any desired location. Additionally, you can resize the video by dragging any of its corners or edges.
- Step 5: Upon insertion, the Format Options sidebar will open, enabling you to customize the video playback settings.
– Play: Choose between “On Click,” “Automatically,” or “Manually” to determine the starting point for video playback.
– Start At and End At: Specify the specific segments of the video you wish to play by entering the start and end times or using the “Use Current Time” option.
– Mute Audio: If you prefer not to play the video’s audio, simply check the box labeled “Mute Audio.”
- Step 6: After completing the customization of your video’s playback settings, simply close the Format Options sidebar. To access the sidebar again at a later time, you can follow these steps:
- 1. Right-click on the video and select “Format Options.”
2. Click on the video and choose “Format Options” from the top toolbar.
3. Select the video and navigate to “Format” > “Format options” in the menu.
Unlike documents in Google Docs, Google Slides offers the flexibility to incorporate audio and video elements into your presentations. If these multimedia components enhance your slideshow, don’t hesitate to include them for a more engaging and dynamic presentation!
Gizchina News of the week
How to Add Audio on Microsoft PowerPoint
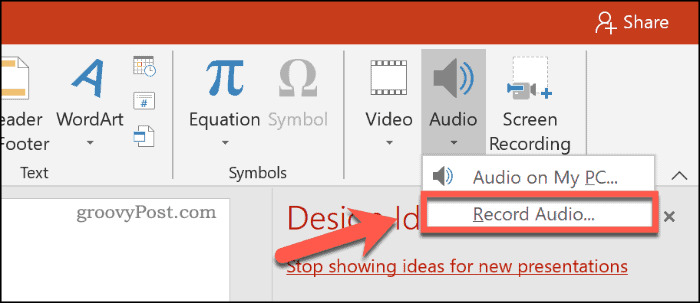
To add audio to your Microsoft PowerPoint presentation, follow these detailed steps:
- Prepare Your Audio File:
- Before you begin, ensure that your audio file is in a compatible format such as MP3 or WAV.
- Make sure the audio file is saved in a location where it can be easily accessed.
- Open Your PowerPoint Presentation:
- Launch Microsoft PowerPoint and open the presentation to which you want to add audio.
- Navigate to the Slide:
- Go to the slide where you want to insert the audio.
- Insert Audio:
- Click on the “Insert” tab at the top of the PowerPoint window.
- In the “Media” group, select “Audio.”
- Choose “Audio on My PC” if the audio file is stored locally, or select “Online Audio” to insert audio from an online source such as OneDrive or YouTube.
- Select the Audio File:
- Navigate to the location where your audio file is saved.
- Select the audio file and click “Insert.”
- Adjust Audio Settings:
- Once the audio is inserted, a speaker icon will appear on the slide.
- Click on the speaker icon to select it.
- Go to the “Playback” tab that appears on the PowerPoint ribbon.
- Set the playback options such as “Start” and “Stop” to control when the audio should begin and end.
- Choose whether the audio should play automatically or on click.
- Adjust volume settings and other playback options as needed.
- Preview and Test:
- Preview the slide to ensure the audio plays as intended.
- Test the presentation in slideshow mode to verify that the audio syncs correctly with the slide content.
- Save Your Presentation:
- Once you are satisfied with the audio placement and settings, save your PowerPoint presentation.
- Share Your Presentation:
- Share your presentation with others, ensuring that they have access to the audio file if necessary.
- Keep in mind any copyright restrictions if using audio from third-party sources.
By following these steps, you can effectively add audio to your Microsoft PowerPoint presentation, enhancing the overall experience for your audience.
How to Add Video in Microsoft PowerPoint
Adding video to your Microsoft PowerPoint presentation can elevate your slides to new heights by engaging your audience with multimedia content. Here’s a comprehensive guide on how to seamlessly integrate video into your PowerPoint slides:
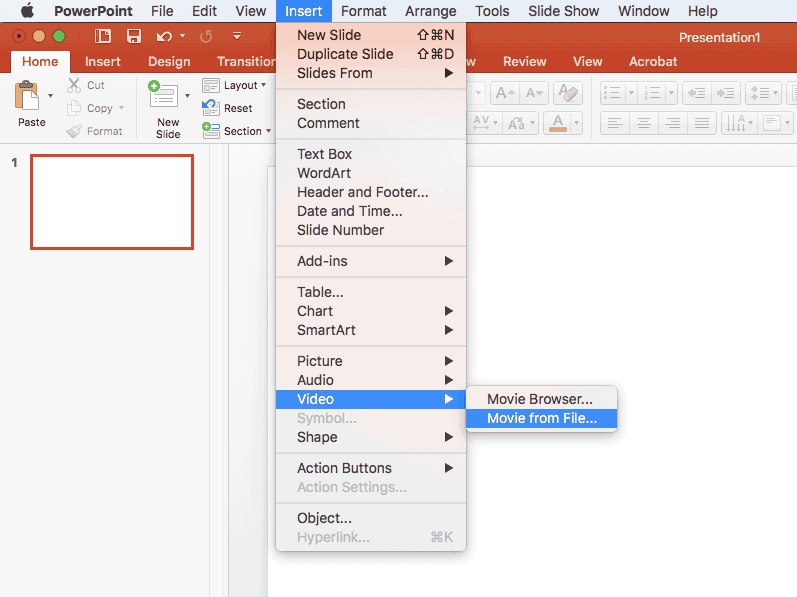
- Prepare Your Video: Before adding the video to your presentation, ensure that it’s in a compatible format. PowerPoint supports various video file formats such as .mp4, .mov, and .avi. Also, consider trimming or editing the video to fit the desired length and content.
- Open Your PowerPoint Presentation: Launch Microsoft PowerPoint and open the presentation in which you want to add the video.
- Navigate to the Slide: Go to the slide where you want to insert the video. Click on the slide in the slide thumbnail view on the left side of the screen.
- Insert Video: Click on the “Insert” tab in the PowerPoint ribbon at the top of the screen.
- Choose Video Source: From the Insert tab, click on the “Video” drop-down menu. Here, you have several options:
- Online Video: Insert a video from an online source such as YouTube. Enter the video’s URL in the dialog box and click “Insert.”
- Video on My PC: Insert a video saved on your computer. Navigate to the location of the video file, select it, and click “Insert.”
- Adjust Video Size and Position: After inserting the video, you can resize and reposition it on the slide as needed. Click and drag the corners or edges of the video to resize it. To move the video, click and drag it to the desired location on the slide.
- Customize Playback Options: PowerPoint offers various playback options for inserted videos. Right-click on the video and select “Playback” from the menu. Here, you can choose options such as:
- Start Automatically: Set the video to play automatically when the slide appears.
- Loop until Stopped: Configure the video to loop continuously until manually stopped.
- Rewind After Playing: Automatically rewind the video to the beginning after it finishes playing.
- Preview and Test: Once you’ve inserted the video and adjusted its settings, preview the slide to ensure that the video plays correctly. Click the “Slide Show” button in the bottom-right corner to enter presentation mode and test the video playback.
- Save Your Presentation: After adding the video, save your PowerPoint presentation to preserve the changes. Click on the “File” tab in the PowerPoint ribbon and select “Save” or “Save As” to save the file to your desired location.
By following these steps, you can seamlessly integrate video into your Microsoft PowerPoint presentation, enhancing its visual appeal and engaging your audience with multimedia content. Experiment with different video formats, playback options, and slide designs to create dynamic and impactful presentations.
Conclusion
In conclusion, both Microsoft PowerPoint and Google Slides offer powerful tools for incorporating audio and video elements into your presentations, enhancing engagement, and conveying your message effectively.
With Microsoft PowerPoint, you can seamlessly integrate audio files and video clips, allowing for dynamic presentations that capture your audience’s attention. By following the step-by-step guides provided, you can customize playback options and ensure smooth integration of multimedia content into your slides.
Similarly, Google Slides provides users with the ability to add audio and video, offering flexibility and creativity in presentation design. Whether you’re delivering a business pitch, educational seminar, or creative project, Google Slides allows you to enhance your slides with immersive multimedia elements.
By leveraging the capabilities of both platforms, presenters can create engaging and impactful presentations that leave a lasting impression on their audience. Whether you choose Microsoft PowerPoint or Google Slides, incorporating audio and video elements can elevate your presentations and effectively communicate your ideas.
How To Add Video or Audio to Google Slides and Microsoft PowerPoint


