

“How do I transfer photos from iPad to computer as I want to edit them on my work computer? I don’t want to use iTunes or iCloud as it has very low transfer speed. Is there another way to move photos to my computer? Also, how do I transfer photos from computer to iPad after editing?”
Apple users have been worrying about these questions since hearing about Apple’s upcoming event on Tuesday, May 7 at 7am PT (10am ET). The tech giant could launch a new iPad, Apple Pencil, Apple Watch, and more.
If you are also an avid Apple user, you would like to know the easiest way to transfer photos from computer to iPad and vice versa. Fortunately, we have four methods for you. And if you’re wondering, “Can I transfer photos from ipad to computer without iTunes or iCloud, we have a solution for that too. So, let’s get started!
Method 1. How to transfer photos from computer to iPad without iTunes or iCloud
So, how do I transfer photos from iPad to computer and vice versa without iTunes and iCloud? how to transfer photos from iPad to computer with iTunes? Or, if you want to know how to transfer photos from iPad to Windows 10 PC, keep reading!
To answer simply, consider a third party tool like Tenorshare iCareFone. With this, you can transfer files from computer to iPad and vice versa and transfer iPad to new iPad with just one click. It’s faster than using iTunes or iCloud, and you can choose exactly what you want to transfer to your iPad. iCareFone has other great features that you may find useful, such as:
- Transfer photos from computer to iPad with a USB cable that is 10 times faster than iTunes/iCloud.
- It can move up to 3000 photos at a time in just 5 minutes between iOS devices.
- There are no storage limits or restrictions on moving more than one photo.
- Easily customize your settings, such as changing iPhone photos to JPG format.
- Supports 18+ data types including photos, audio, contacts, videos, messages and documents.
- Works with over 6000 iOS, Android and Windows devices
- Fast conversions with efficient and stable performance.
- Works with iOS 17 and all the latest iPhone models.
- Transfer WhatsApp data, backup to your computer for free and restore to any iOS device.
Here’s how to transfer photos from iPad to PC without iTunes/iCloud or vice versa using Tenorshare iCareFone tool:
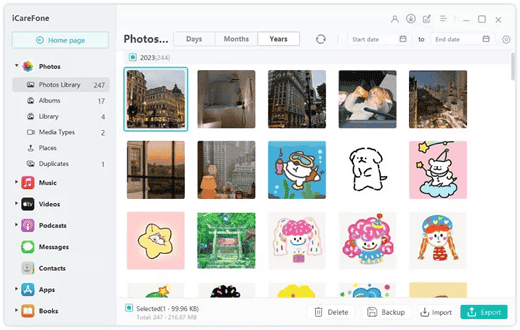
Step 1: Download and install the transfer tool on your computer. Then connect your iPad to your computer and launch the tool. Select “Manage”.
Step 2: Click on Photos and you will see all the photos on your iPad. Select the ones you want to move to your computer. Click “Export”.
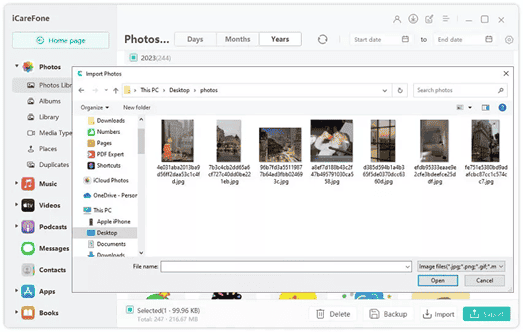
Step 3: To move photos from your computer to your iPad, follow the same steps. But instead of pressing Export, click Import. Your photos will be transferred to your iPad from your computer.
Method 2. How to transfer photos from computer to iPad with iTunes
Still want to learn how to transfer photos from iPad to computer or vice versa with iTunes? First, make sure you’ve synced your iPad with iTunes and turned off iCloud syncing. Also, this method will remove all photos from iPad Photo Library, so beware of that as well.
Here’s how to move photos from your computer to iPad with iTunes:
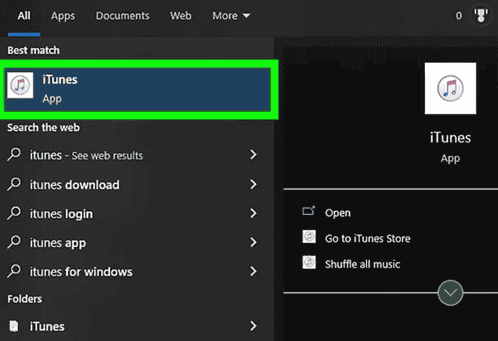
Step 1: Connect your iPad to your computer and open iTunes on your computer. Wait for your iPad to appear and select the “Device” icon.

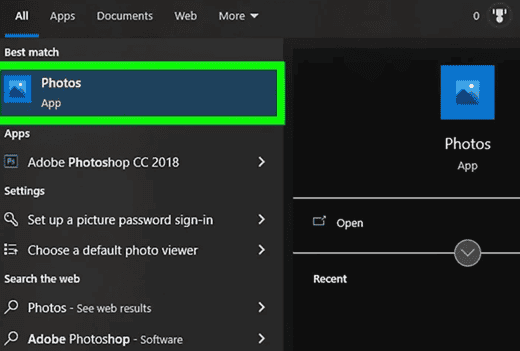
Step 2: Wait for your computer to connect to iTunes. Next, type “Photos” in the Windows search bar and open the Photos application on your computer.
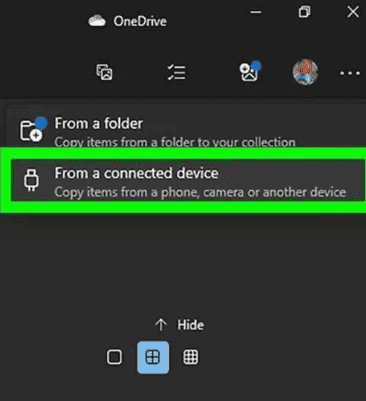
Step 3: Press the “Import” icon in the upper right corner and select “From a connected device” from the drop-down menu.
Step 4: Your computer will search for photos on your iPad. Select the ones you want to transfer or “Select All”. Click “Import”.

Gizchina News of the week
Method 3. Transfer photos from computer to iPad using iCloud
Don’t want to use iTunes but have an iCloud account? So, how to transfer photos from computer to iPad or vice versa using a cloud server like iCloud. There’s no direct way to move photos between an iPad and a computer with iCloud. You’ll need to sync your photos with iCloud first to upload them to its server and then download them from there on any device. To do this:
Here’s how to move photos from computer to iPad with iCloud:
Step 1: Head to Settings on your iPad, then tap iCloud. Then select Photos and turn on iCloud Photo Library.
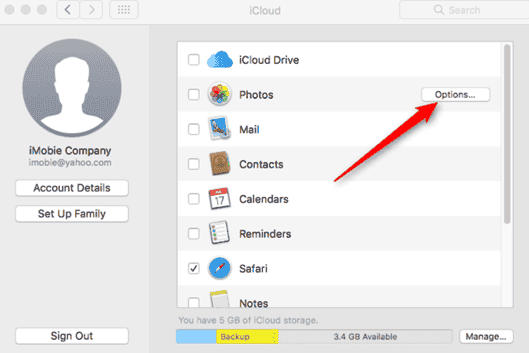
Step 2: Open the iCloud app on your computer and sign in with your Apple ID. On the Photos tab, click Options.
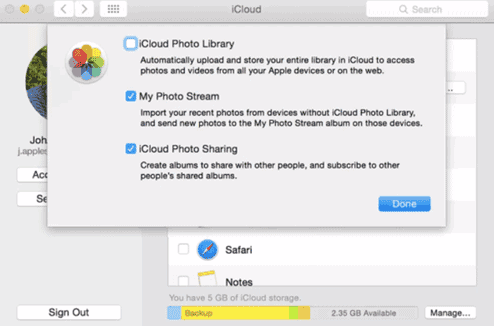
Step 3: Select “iCloud Photo Library” and “Upload new photos and videos from my computer”. Click Done, then tap Apply on the main iCloud interface.
Step 4: On your computer, go to iCloud, then select “Upload Photos” and select photos you want to transfer to iPad.
Method 4. How to load iPad photos from computer using Google Photos
If you don’t want to use iTunes, iCloud, there is another way you can learn how to transfer photos from iPad to computer or vice versa. Google Photos offers 15 GB of storage for free, which is more than iCloud’s 5 GB. So you can move quite a number of high quality photos between iPad and computer. Here’s how to transfer photos from iPad to PC without iTunes/iCloud or vice versa using Google Photos:
Here’s how to transfer photos from computer to iPad using Google Photos:
Step 1: Get Google Photos on your iPad from the App Store and sign in to Google Photos on your computer with your Google account.
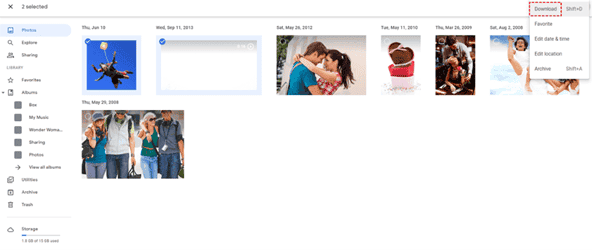
Step 2: Click “Upload”, select photos you want to move to your computer, choose a size to upload and click “Continue”. Click Add to Album to create or select an album to save photos.

Step 3: On your iPad, open Google Photos, tap the hamburger icon, and head to Collections. Step 4: Select a photo album, tap the ellipsis icon and select Select.
Step 5: Select photos to transfer, tap Share, then select Save. [number] Images’ to download them to your iPad, where you can find them in the Photos app.

Here’s how to move images from iPad to computer using Google Photos:
Step 1: Download the Google Photos app from the App Store on your iPad and use it to upload your photos to your Google account.
Step 2: Sign in to your Google account on your computer and download photos from Google Photos.
[Bonus Tips] How to transfer photos from computer to iPad using Bluetooth?
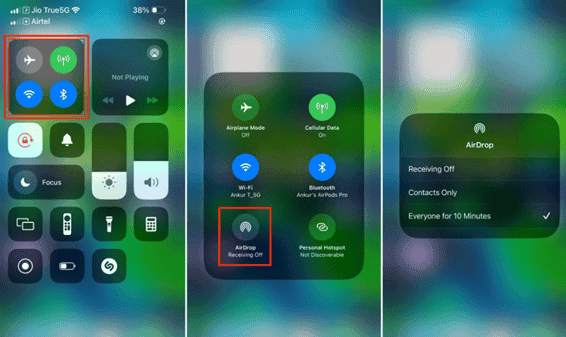
Here’s a tip if you don’t want to use a tool, cloud service, or USB to transfer files between your iPad and Mac: try AirDrop. It uses Bluetooth to send photos and other files to nearby devices and computers. But make sure you’re using an iPad 4 or later or iOS 7 or later to use AirDrop. Here’s how to transfer photos from PC to iPad wirelessly using this method:
Step 1: Turn on Bluetooth and Wi-Fi on your iPad and Mac. Head to Go in the menu bar and select AirDrop.
Step 2: Enable “AirDrop” and select “All in 10 minutes”.

Step 2: In the Photos app on your computer, select photos you want to transfer and tap Share at the bottom left. When prompted, select your iPad and accept the photo transfer.
Conclusion
When it comes to learning how to transfer photos from computer to iPad or vice versa, methods like iTunes, iCloud, and Google Photos may not be good options. However, a tool like Tenorshare iCareFone does not inherit their limitations such as slow transfer rates and others.
With this tool, you can move 18+ types of files, including photos, between different iOS devices. It also offers the convenience of batch transfer of up to 3000 photos in just 5 minutes. You can also choose which file to transfer and which not.
Top 4 Ways to Solve How to Transfer Photos From PC to iPad 2024


